Hello Everyone!
I am super excited about this one because in the article we will be talking about how to set up webpack, babel, and Tailwindcss.
Prerequisite
Nodejs
A text editor ( vscode is actually nice)
Before we start, I'd like to give a short description of the major technologies we will be using;
Babel: It affords us the opportunity to write bleeding edge javascript code across all platforms. It does so by converting the new syntax to an old one readily supported by all browsers. see docs
Webpack: This is a module bundler. It takes multiple source files and bundles them into a single output. see docs
Tailwindcss: A utility first CSS framework that allows us to style our applications. see docs
Lets Initialize our project
To kick off the project, create a directory and name it anything. In that directory, simply run the command below. This will generate a package.json file in the root of your project.
npm init -y
Install Dependencies
npm install webpack webpack-cli webpack-dev-server @babel/cli @babel/core @babel/preset-env babel babel-loader css-loader style-loader postcss postcss-loader cross-env tailwindcss
In the root of your project, create a file webpack.config.js or simply type the command below in your terminal. Ensure you're in the root directory of your project.
touch webpack.config.js
Create two folders dist and src. The src folder is where we will be writing our code. The dist folder is where our compiled and bundled file(which we finally push to production) will be.
Inside the src folder create an index.js file. In the dist folder create an index.html file and also a bundle.js file. Add the bundle.js file into the index.html file so the html file can use it as that's where all our bundled files will be. So the Html file looks as below
<html lang="en">
  <head>
    <meta charset="UTF-8" />
    <meta name="viewport" content="width=device-width, initial-scale=1.0" />
    <title>Webpack, Babel and TailwindCss</title>
  </head>
  <body>
    <div>
      <h1>Welcome</h1>
    </div>

    <script src="bundle.js"></script>
  </body>
</html>
Note: These files can be named anything
Open the webpack config file and type the code below in it.
const { resolve } = require('path');

module.exports = {
  entry: './src/index.js',
  output: {
    path: resolve(__dirname, 'dist'),
    filename: 'bundle.js',
  },

  module: {
    rules: [
      {
        test: /\.js$/,
        exclude: /(node_modules)/,
        use: {
          loader: 'babel-loader',
          options: {
            presets: ['@babel/preset-env'],
          },
        },
      },
      {
        test: /\.css$/i,
        use: ['style-loader', 'css-loader', 'postcss-loader'],
      },
    ],
  },

  devServer: {
    watchContentBase: true,
    contentBase: resolve(__dirname, 'dist'),
    compress: true,
    port: 9000,
    open: true,
  },
};
To find out more on how the config works please look up the docs. But for a short description, we added the path to our entry file (index.js) and also where webpack should bundle our files to (the output path).
We used the module field to add loaders which primarily helps us preprocess our files. see docs. Here we are using the style-loader, css-loader to enable us import styles in our project. Also, because tailwind uses postcss we have to add the postcss-loader.
Note: The order for these css loaders matters. style-loader comes first then css-loader and finally postcss-loader.
Now we added the dev server and instructed it to watch our files as well as run on port 9000(which you can change).
Add Tailwind to our Project
To add tailwind to the project, run the command below to generate the tilwind config file.
npx tailwindcss init
Edit the config file to look like this
module.exports = {
  purge: ['./**/*.html'],
  darkMode: false, // or 'media' or 'class'
  theme: {
    extend: {},
  },
  variants: {
    extend: {},
  },
  plugins: [],
};
Note: We edited the purge field to enable us to remove unused CSS when we are building for production
On the root of the project, create a file postcss.config.js
Inside the postcss config file, we have to require tailwind and postcss. Simply type the command below;
module.exports = {
  plugins: [require('tailwindcss'), require('autoprefixer')],
};
So, now, inside the src directory create a style.css file and add the following to it
@tailwind base;
@tailwind components;
@tailwind utilities;
The last thing we have to do is update the scripts in our package.json. So, the package.json will look like the one below;
{
  "name": "tailwind-webpack",
  "version": "1.0.0",
  "description": "",
  "main": "index.js",
  "scripts": {
    "start": "webpack serve --mode development",
    "build": "cross-env NODE_ENV=production webpack --mode production"
  },
  "keywords": [],
  "author": "",
  "license": "ISC",
  "devDependencies": {
    "@babel/cli": "^7.12.10",
    "@babel/core": "^7.12.10",
    "@babel/preset-env": "^7.12.10",
    "autoprefixer": "^10.1.0",
    "babel-loader": "^8.2.2",
    "css-loader": "^5.0.1",
    "file-loader": "^6.2.0",
    "postcss": "^8.2.1",
    "postcss-loader": "^4.1.0",
    "style-loader": "^2.0.0",
    "tailwindcss": "^2.0.2",
    "webpack": "^5.10.1",
    "webpack-cli": "^4.2.0",
    "webpack-dev-server": "^3.11.0"
  },
  "dependencies": {
    "cross-env": "^7.0.3"
  }
}
To run our project locally, type the command below on your terminal;
npm start
To also, build our project for production, type the command below on your terminal;
npm run build
When we build for production, we can then push the dist folder to our server.
Also, you can update the index.html file to the one below before you run the app locally to see the change
<html lang="en">
  <head>
    <meta charset="UTF-8" />
    <meta name="viewport" content="width=device-width, initial-scale=1.0" />
    <title>Welcome to Tailwind</title>
  </head>

  <body class="bg-gray-800 flex items-center justify-center">
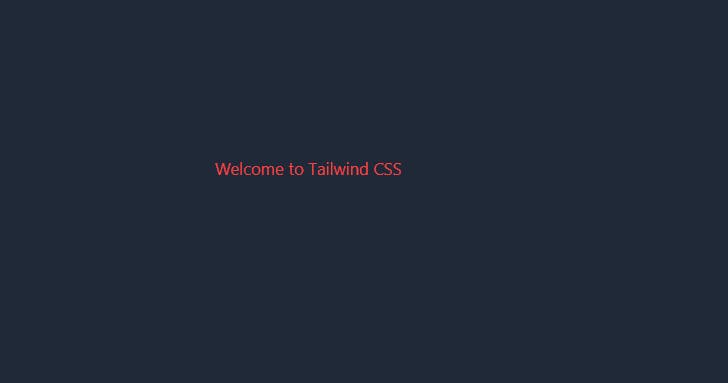
    <h1 class="text-xl text-red-500"> Welcome to Tailwind CSS </h1>
    <script src="bundle.js"></script>
  </body>
</html>
When you run the app, we should see something like this

That's it, I hope it was helpful to you. Thanks for reading!

